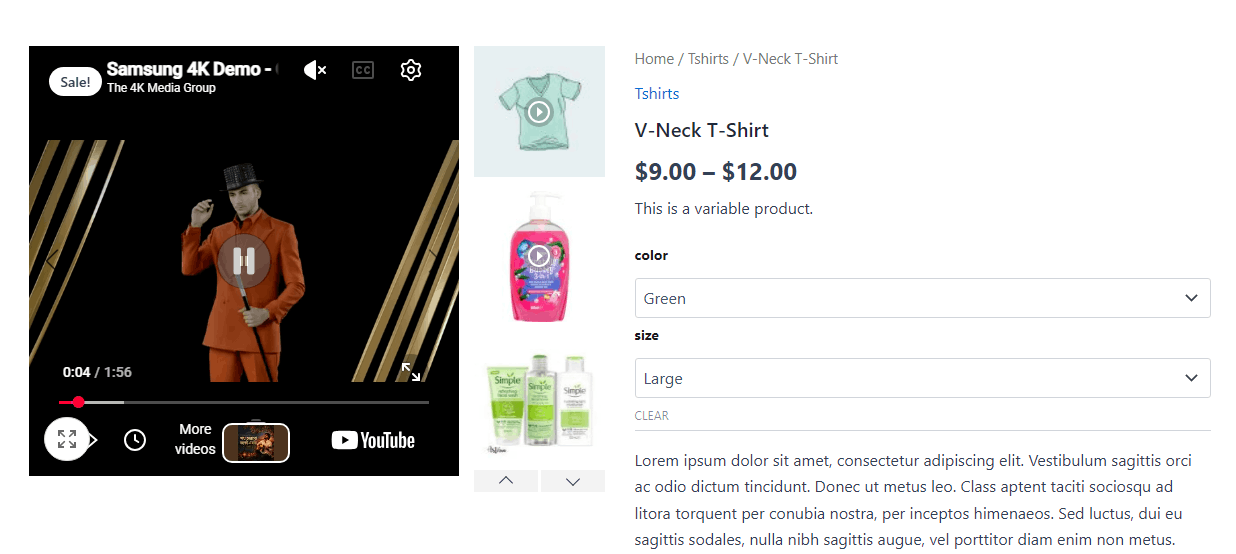
WooCommerce Product Video Gallery allows you to assign specific videos or video galleries to individual product variations. When a customer selects a variation (e.g., Color or Size) on the frontend, the gallery dynamically updates to showcase the video tailored to that specific option.
Step-by-Step: Adding Videos to Product Variations #
-
Go to WordPress Dashboard → Products → All Products and edit a Variable Product.
-
Scroll down to the Product Data box and select the Variations tab on the left.
-
Click to expand the specific variation item you want to edit (e.g.,
#29 Green).
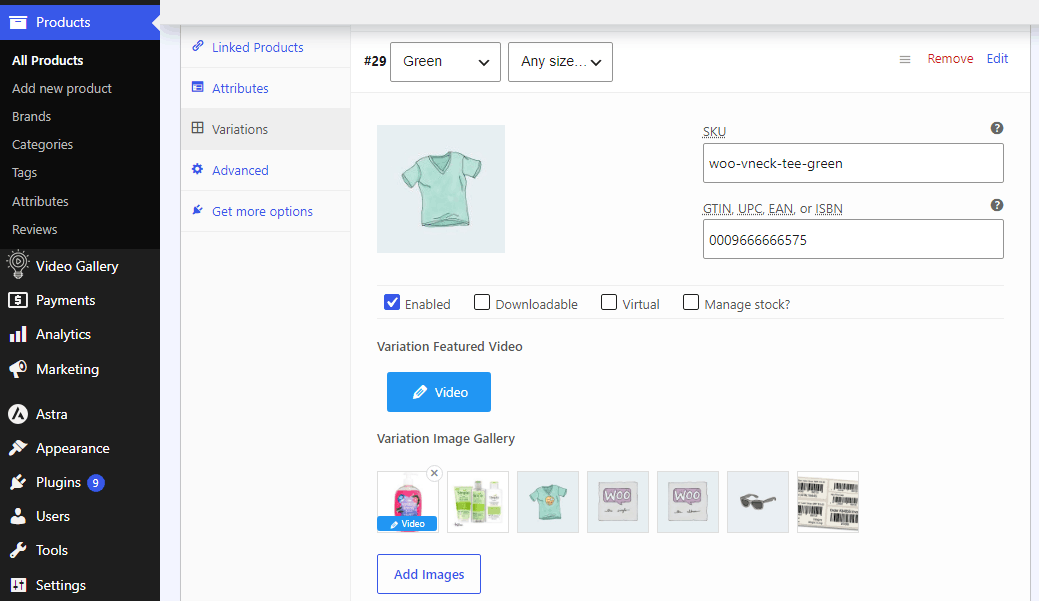
1. Setting a Variation Featured Video #
To replace or pair the main variation image with a video:
-
Locate the Variation Featured Video section under your variation fields.
-
Click the blue Video button.
-
In the modal pop-up, configure your video settings:
-
Video Source: Choose YouTube, Vimeo, or Self-Hosted MP4.
-
Video URL / File: Paste the video link or select an MP4 file from your Media Library.
-
Custom Poster: Set a custom cover thumbnail (if left blank, the main variation image will be used).
-
-
Click Save / Close.
2. Adding Videos to Variation Gallery Images #
You can also attach videos to individual thumbnail images within a variation gallery:
-
Scroll to the Variation Image Gallery section within the variation panel.
-
Hover over any uploaded gallery thumbnail (or click Add Images to upload new ones).
-
Click the small Video button that appears on the image overlay.
-
Enter the Video Source and Video URL/File in the modal.
-
Click Save Changes.
How It Works on the Frontend #
-
When a shopper selects a variation on the product page (for example, switching from “Red” to “Green”), the main gallery slider immediately reloads.
-
The variation’s featured video or video gallery thumbnails will appear seamlessly with play icons/badges without reloading the entire page.